Tutorial – Changing Playable Character
The purpose of this tutorial is to change the character model from the nanosuit to something a bit more acceptable for the purposes of architectural visualization.
Open Crysis Sandbox 2
Open the Character Editor: View>Open View Pane>Character Editor
Or Click on the Green Person symbol at the right of the top menu bar
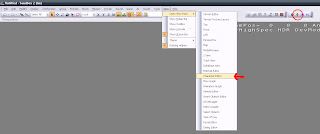
Note: The green person symbol is with the Material editor, Database View and Flowgraph shortcuts – all very useful shortcuts.
The Character Editor will open up and look similar to the following image
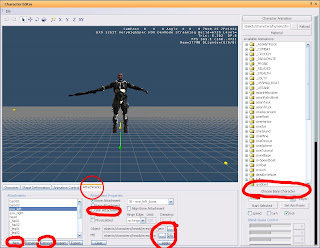
The parts of the Character Editor we are concerned with for the purposes of the tutorial are marked.
What we will be doing is changing a part of the game script (don’t worry the scripting is easy) to call a different model instead of the nanosuit model.
There is a trick to it though.
The nanosuit character is set up differently to all the others, in a way that prevents us from simply swapping it for another character model, as the animations and materials will not show properly.
Basically if we just change the model in the script to an existing character it will still show up with some nanosuit textures showing at the same time as the new character textures.
We need to edit an existing character and replace its attachments.
Open an existing character
File>Open (in the character editor)
Find this particular character model:
Game/objects/characters/human/asian/nk_soldier/nk_soldier_jungle_light_leader_01
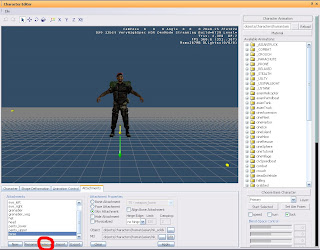
Remove all attachments
You should be left with nothing visible in the preview window.
IMPORTANT If after removing all the attachments there is still some part of the character left make sure you have selected the character listed above to edit. Even if you want the part that is left you need to add it to a blank character file or there will be issues with nanosuit textures showing up.
Now we add our own attachments.
This will usually be done by adding a body, hands and a head
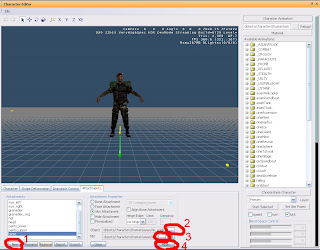
Step 1: Make a new attachment and in the popup enter a name for it, ie body, hands, head
Step 2: Find a model
Model should be .chr files, not .cdf. Cdf are what the completed character is saved as.
I used this model: objects/characters/human/us/officer/officer.chr
Step 3: Assign a material to the model
The material to assign should be located in the same folder location as the mesh itself and should be of the same name.
The material selection for characters seems a bit screwy so it might be a bit difficult to scroll down to the material you need. If you are having trouble try expanding some of the materials below the one you need and then scrolling down – seemed to work for me
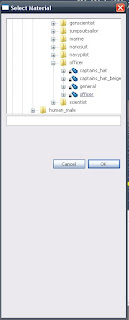
Step 4: Apply to see changes in the preview window
Do this for the remaining body parts
They should all be added as Skin Attachments (as opposed to Bone or Face attachments)
For you reference I used
Body: objects/characters/human/us/officer/officer.chr
Hands: objects/characters/human/hands/officer_hands.chr
Head: objects/characters/heads/us/caucasian_01/caucasian_01.chr
If in doubt of where to find good models open up an existing character and see where their models are located.
Finally
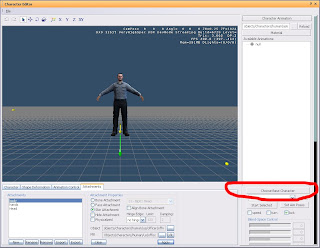
Click the “Choose Base Character” button
This reloads all the relevant animations for the character and you can now open click on them and see how they work on your character.
Save your character to Game>Objects>Character
Use a unique name and save as a .cdf file
Alternatively you can save the character in a custom folder within the Objects folder structure so that it is easier to transfer between computers.
Now to change the script
The scripts are all bundled up into .pak files that we need to open up.
They are located in the Game folder of Crysis Wars
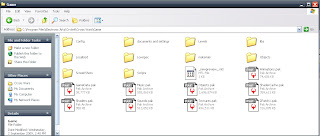
The one we want is GameData.pak
Copy it to another location – desktop should be ok
Change the extension from .pak to .zip – ignore the warning
Right click and “extract to…”
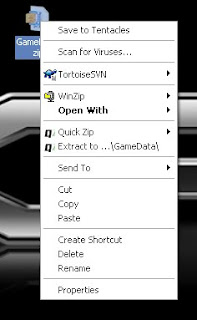
This will take a while
You will get the following folders
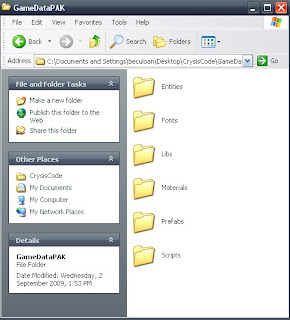
Find the player.lua file in
GameDataPAK\Scripts\Entities\actor
Copy it to C:\Program Files\Electronic Arts\Crytek\Crysis Wars\Game\Scripts\Entities\actor
Open the copied file using notepad and you will see the following:
Script.ReloadScript( "SCRIPTS/Entities/actor/BasicActor.lua");
Player = {
AnimationGraph = "PlayerFullBody.xml",
UpperBodyGraph = "PlayerUpperBody.xml",
type = "Player",
foreignCollisionDamageMult = 0.1,
vehicleCollisionDamageMult = 7.5,
vehicleCollisionDamageMultMP = 0.4,
Properties =
{
-- AI-related properties
soclasses_SmartObjectClass = "Player",
groupid = 0,
species = 0,
commrange = 40; -- Luciano - added to use SIGNALFILTER_GROUPONLY
-- AI-related properties over
voiceType = "player",
aicharacter_character = "Player",
Perception =
{
--how visible am I
camoScale = 1,
--movement related parameters
velBase = 1,
velScale = .03,
--ranges
sightrange = 50,
} ,
--
fileModel = "objects/characters/human/us/nanosuit/nanosuit_us_multiplayer.cdf",
clientFileModel = "objects/characters/human/us/nanosuit/nanosuit_us_fp3p.cdf",
--fileModel = "objects/characters/human/asian/nanosuit/nanosuit_asian_fp3p.cdf",
fpItemHandsModel = "objects/weapons/arms_global/arms_nanosuit_us.chr",
--fpItemHandsModel = "objects/weapons/arms_global/arms_nanosuit_asian.chr",
objFrozenModel= "objects/characters/human/asian/nk_soldier/nk_soldier_frozen_scatter.cgf",
},
PropertiesInstance = {
aibehavior_behaviour = "PlayerIdle",
},
Etc.
It continues on for quite a while.
We need to change the clientFileModel to the new character you created. Ie change the highlighted text to the path of your new character .cdf file.
Save the .lua file
Now when you open the editor and game this player.lua file will be read before the one that is in the .pak file effectively overwriting the nanosuit guy with a normal, presentation acceptable model
NOTE: If moving between computers, this script file needs to be copied into the same location on each computer. Crysis reads scripts from the Scripts folder only so it cannot be put with all your other custom content in the Objects folder.
This makes file transfer a bit tedious, especially if you have lots of different scripts, to change more than just the character model. This is called a mod and there is an alternate folder structure that can be used for this purpose but is not in the scope of this tutorial.
NOTE: A common issue with the character editor is that the bottom couple of buttons are cut off and can’t be accessed no matter how you resize it. This is a dpi issue on the computer you are using. If you are having this problem
Right click somewhere on the desktop
Click Properties
Click on the Settings tab
Click the Advanced button
Click the General tab
And under the DPI setting scroll down and change it to Normal size (96 DPI on the computer I am using).